
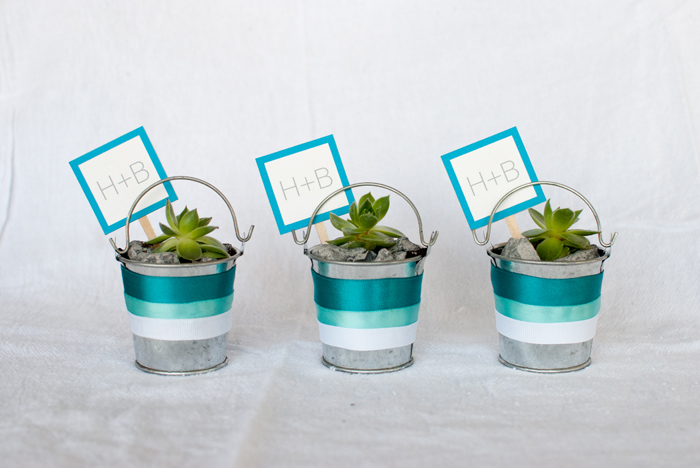
I am really excited to share this DIY modern succulent pail favor project with you! I partnered with Michaels® to show you how to create these adorable favors step by step. The little succulent pails can be favors, or also serve as escort/place cards. You can easily customize the ribbon and sign colors to match your wedding palette. You might also consider including care directions for your guests so they can grow their succulent and eventually re-plant it in a larger container. Since the succulents are living plants, the favors can be assembled weeks ahead of the wedding and maintained with a little plant care.
Michaels® is offering Modernly Wed Readers 20% off your entire regular price wedding purchase, valid now through June 30th. Click here to get your coupon!

Supplies:
- Celebrate It™ Galvanized Pail Set (12 mini pails each)
- Celebrate It™ 360 ribbon in three shades of selected color
- Wooden Dowels or Craft Sticks
- Card Stock
- Hot Glue Gun and Hot Glue Sticks
- Potting Soil
- Small Decorative Stones
- Scissors
- Succulent Plant
Step 1: Measure needed ribbon length to go around the small pails. Cut strips to length from each color of ribbon.

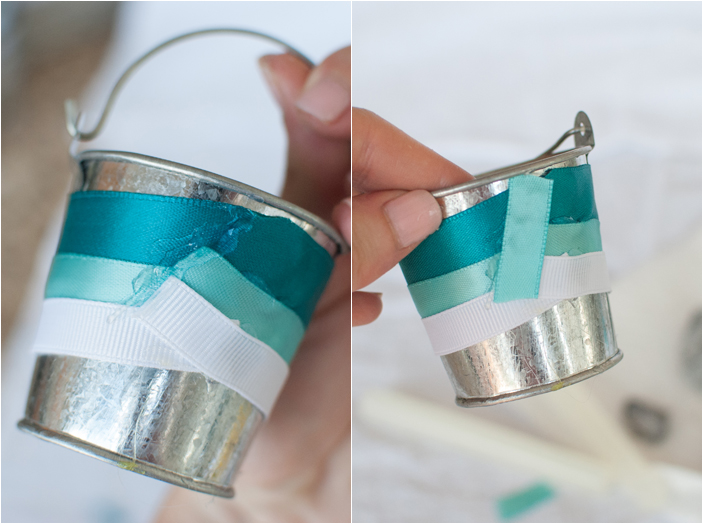
Step 2: Put a small dab of hot glue on the back of the pail and affix one end of the darkest ribbon. Pull the ribbon around the pail, sloping upward slightly toward the back to account for the curvature of the pail. Glue the end of the ribbon in place. Repeat with the other two ribbon colors, slightly overlapping each over the last.

Step 3: Cut a small piece of ribbon and glue it over the ribbon ends to give a more finished look to the back of the pail.
Step 4: Separate small buds off of your succulent plant. Try to get a little bit of root with each one. Fill each pail to the top with potting soil.

Step 5: Place a few decorative stones around the edges of the soil. Make a small hole and place the succulent in the soil.

Step 6:
Create sign artwork on your computer. My signs are 1.5″ square. Print
both sides of the signs on card stock and cut to size. Gather your
wooden craft sticks and trim them to length, if needed.

Step 7:
Place a dab of hot glue on the back of the front sign, affix the wooden
stick. Add a bit more glue to the center and sides of the card stock
and apply the backside of the sign.

Step 8: Place your signs in the pails and admire your work!


Images and execution by Kate